So last week I picked up a chandelier off of CL and we had plans to lengthen the wire (to 5.5') so that we could swag it.
Unfortunately, lengthening the wire basically means swapping out the wire. There's no safe or legal way around it. This also means we need a longer chain. Actually, you don't have to buy the chain to your full, desired length; you can just buy enough to cover the difference. But silly me didn't think of that so we bought a 5.5' chain instead of a 5' chain. Boo. I could've saved 50 cents! (Oops, did I just expose my inner cheapo? It's okay, it was only a matter of time.)
So after we got all our supplies, the first thing we did was prep the chandelier for spray painting. This just means covering all the wiring and parts you don't want to paint with some blue painter's tape (easier to remove than regular tape). We used cut up pieces of a grocery bag to cover the wires of the 6 bulbs and then taped it in place. And that's pretty much it!

Spray painting is not a hard thing to do. Just make sure you do it in a ventilated place (we did ours in the garage with the door open). You basically lay everything on the cardboard, put on the face mask and spray away!

Don't worry too much about covering everything the first time around. It's better to have multiple even, thin coats than one very thick, drippy coat. We ended up having to turn the chandelier around, upside-down 4 or 5 times before we covered every nook and cranny.
And at the end, this is how our newly painted chandelier looks! We are really loving the oil rubbed bronze! So much nicer than Old-Rusty, wouldn't you agree?
And at the end, this is how our newly painted chandelier looks! We are really loving the oil rubbed bronze! So much nicer than Old-Rusty, wouldn't you agree?

Here's Old-Rusty again just so we can fully appreciate the difference.

So after painting comes the rewiring. This really is the scary (I mean, new and exciting!) part. I sort of wished we did a test beforehand to make sure the chandelier actually works. You know, so after we rewired it, we'd know that it was supposed to work. So that if it doesn't work, we could do some root cause analysis as to why it's not working instead of wondering if it worked in the first place. Oh well, this is not the time for should've, could've, would'ves. Here goes.
Hey! That was easier than I thought! It was a lot of threading the wire through different parts of the chandelier, but the actual wire connecting part wasn't hard at all. I did it all by myself before David came home last night. Took around 30 minutes tops. Yay for happy surprises of things being easier than expected!
So now we're all ready to swap out the old fixture with Bronze Beauty (oh, I kind of like how that sounds.) The bad news is this is the first time either of us has changed out a light fixture. But how hard can it be, right? (Obviously I'm still riding on the confidence from rewiring).
Thankfully David came home at this point and we had dinner first before we went on. (Having a full belly is essential to morale.)
We removed the cap off the old fixture and was relieved to see that it sort of has the same parts as BB. Huge mental relief. We took a picture at this point just for reference. (This is also when we shut off the power to this part of the kitchen to ensure we don't electrocute ourselves.)

When we removed the old fixture, we found that it came with 3 wires: one white, one black and one green. We're assuming the white and black wires are the live wires and the green one is ground. But umm, this is probably not a good thing to have doubts about. So David found this tutorial online and it confirmed our thoughts. Hooray! So all we have to do is hook up our 18 AWG wire to where the black and white wires used to be. Then we'll hook up the copper ground wire to where the green wire used to be. (By "we" I meant David.)

Hey that wasn't too bad! Excited, we put on the candelabra bulbs (6 for $2.50 at Walmart!) and crossed our fingers. David went outside the house to switch on the power and lo and behold. WE. HAVE. LIGHT!
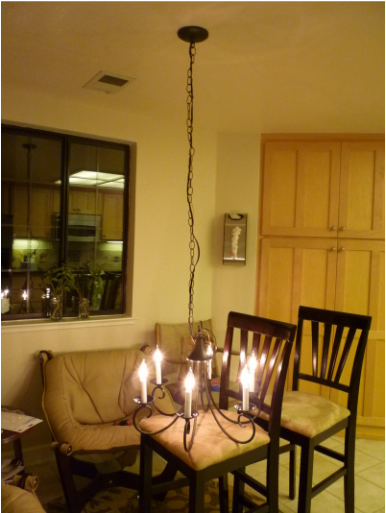
I was so happy-shocked that I practically squealed. There was one issue, though. (Talk about raining on our parade.) We noticed that the light was hanging on the copper ground wire instead of the chain. This is not good. You want the tension to be on the chain and not the wires (that's the whole point of having a chain in the first place). So obviously, the chain needs to be shortened.
Okay, no problem. We turned off the power switch again and removed the fixture from the ceiling. We laid the chain and wires on the ground, eyeballed how many chains we should remove to make it the shortest of the three and removed them. While we were at it, we also cut the black wire to make it the same length as the copper wire (I don't know why they were different in length in the first place). Then, we put it up again.
Hmm. Strange, now the light was hanging on the black wire! *Sigh. To make matters worse, we also sort of messed up when we rethreaded the wires through the chain.
Allow me to explain why this is such a big deal. The black and copper wires need to be buddies that are joined at the hip. Whichever loop in the chain the black wire goes through, the copper wire should go through the exact same loop in the exact same way. If not, you'll get tangled wires when rotating the fixture in place. You'll also get a lot of friction when sliding the chain along the wires.
Trust me on this one. We probably took down the fixture 4 or 5 times because of this mistake. My patience slipped rapidly after maybe the 3rd time we took down the fixture. I wanted to give up and call it a day. Thankfully, David remained a positive trooper and kept us going. (Thank you, honey). :) If I were to do this all over again, I would tape the copper wire to the black wire and thread both at the same time.
So back to our issue with the tension being on the black wire. We finally just removed enough links of the chain until the tension rests on the chain. I'm sure there's a more scientific way to do this, but we sort of went the trial and error route. (Not recommended, by the way. Those chain links are hard to pry open.)
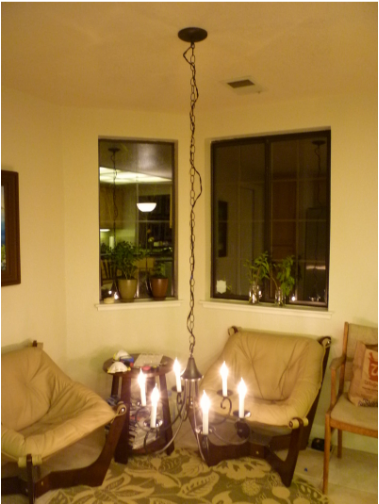
Despite the setbacks, we amazed ourselves with this project. I mean, the light actually works! *A big pat on the back for the electrically challenged couple!* :)
I know, I know. It's too early to celebrate. We still have to hang the ceiling hook and swag it. By the time we got to this point, it was already 11:30 PM and it was past bedtime for us so we called it a night.
Okay, no problem. We turned off the power switch again and removed the fixture from the ceiling. We laid the chain and wires on the ground, eyeballed how many chains we should remove to make it the shortest of the three and removed them. While we were at it, we also cut the black wire to make it the same length as the copper wire (I don't know why they were different in length in the first place). Then, we put it up again.
Hmm. Strange, now the light was hanging on the black wire! *Sigh. To make matters worse, we also sort of messed up when we rethreaded the wires through the chain.
Allow me to explain why this is such a big deal. The black and copper wires need to be buddies that are joined at the hip. Whichever loop in the chain the black wire goes through, the copper wire should go through the exact same loop in the exact same way. If not, you'll get tangled wires when rotating the fixture in place. You'll also get a lot of friction when sliding the chain along the wires.
Trust me on this one. We probably took down the fixture 4 or 5 times because of this mistake. My patience slipped rapidly after maybe the 3rd time we took down the fixture. I wanted to give up and call it a day. Thankfully, David remained a positive trooper and kept us going. (Thank you, honey). :) If I were to do this all over again, I would tape the copper wire to the black wire and thread both at the same time.
So back to our issue with the tension being on the black wire. We finally just removed enough links of the chain until the tension rests on the chain. I'm sure there's a more scientific way to do this, but we sort of went the trial and error route. (Not recommended, by the way. Those chain links are hard to pry open.)
Despite the setbacks, we amazed ourselves with this project. I mean, the light actually works! *A big pat on the back for the electrically challenged couple!* :)
I know, I know. It's too early to celebrate. We still have to hang the ceiling hook and swag it. By the time we got to this point, it was already 11:30 PM and it was past bedtime for us so we called it a night.

 RSS Feed
