So in yesterday's post, I talked about how we settled on the height and color of the stripes. So the next step is measuring & taping. This was the hardest step in this project for me.
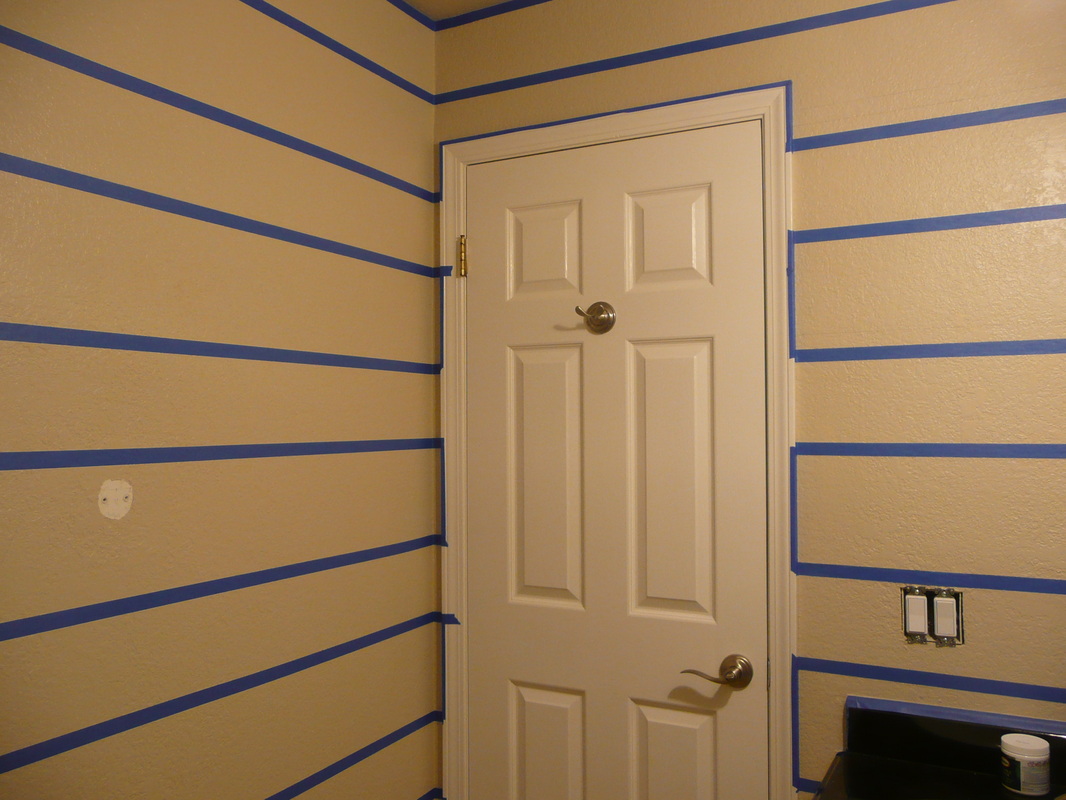
The first obvious thing about taping is that you are taping around the white stripes (since we are not painting the beige stripes - they are already there). So the stripes will look different in height when taped, but at the end it will come out right. Hope that makes sense.
The more confusing part turned out to be determining where to tape. From my "blueprint", it seemed pretty straightforward. All I had to do was use a ruler and tick off every 8.34", use a leveler and draw a straight line. However, after doing a little level test, I realized the ceiling and the baseboards are actually not straight! So trying to draw perfectly straight lines is not the way to go. I'm dealing in relative straightness at this point, not absolute straightness.
So I made the executive decision to do my best to give the illusion of straight lines. For example, around the bathtub. The tiles around the bathtub is not level all the way around (surprise, surprise). But I used it as a reference so that my stripe just above it will seem straight, even if it's actually not. What I did was measure and made tick marks 4" above the tiles, drew a line to connect the ticks, and then taped. So at the end, the line looks straight compared to the tiles.
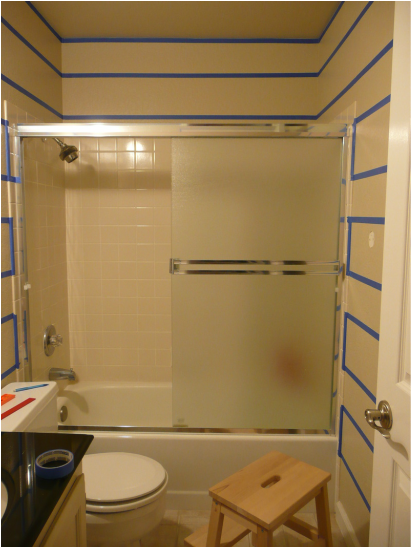
I did the same thing with the door. I used the door as the reference for the stripes around the door so they seem straight. Even though there is a slight slope in the lines, no one will ever know!
This off-the-cuff way of doing things was definitely uncomfortable for my OCD self but right at home with my engineering self. Things always turn out differently than plans on paper and this is when you have to think on the fly and change plans. But at the end I think it was for the better.
Even though the stripe height was supposed to be 8.34", if you were to measure them you'll realize that they vary between 8.25" and 8.75" -- that's a delta of up to 1/2"! But at the end, the eye will never figure that out and each stripe looks perfectly straight and evenly spaced.
Oh, and one last thing. At first I was taping by myself and it took me like an hour just to get one wall done. Later David offered to help (thank you!) and I realized how much faster things are with two people. With two people, you can each hold up tape in opposite ends of the wall, pull tight (so the tape doesn't sag) and tape it down. Simple and fast! So if you want to do this project, grab a partner!

 RSS Feed
